
TL;DR
Moving your rig into a closet or small space can dramatically reduce noise and improve sound quality. The key is balancing dampening, placement, and ventilation—treating reflections and controlling low-end buildup make all the difference.
Ever wondered if you could turn a cramped closet into a decent recording space? The secret isn’t just about slapping foam on the walls. It’s about smart placement, effective dampening, and ensuring your gear stays cool. If you’ve ever fought with echo, low-end booms, or noisy fans while trying to record at home, this guide will change the way you think about tiny studios.
Whether you’re recording vocals, voice-overs, or guitar riffs, the right setup can make a cramped closet sound like a professional booth. This site about sleep health, sleep disorders, and wellness strategies for better rest can offer tips on creating a comfortable environment. No fancy studio required—just some clever tricks, a bit of DIY, and a dash of patience. Here’s what you need to know to get it right—and keep your sanity.
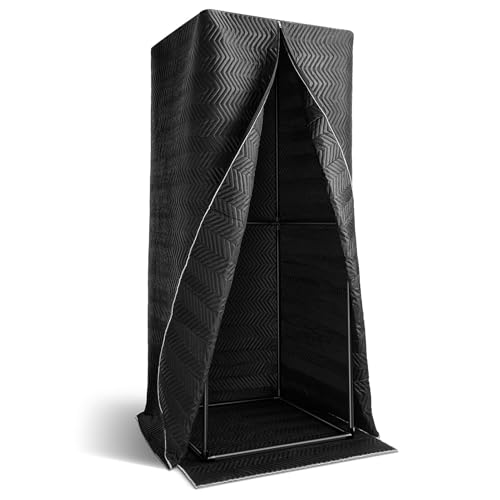
Acoustic dampening
& the rig in the closet.
The most powerful noise fix isn’t a material — it’s a floor plan. A rig you can’t hear because it’s in another room beats any amount of foam. Tap the approaches in Part 1 to see what actually works.
(another room)
(levers 1–4)
(door / barrier)
(acoustic foam)
Contain the noise, not the heat
Key Takeaways
- Prioritize placement: position your mic and performer away from reflective surfaces for instant clarity.
- Don’t forget ventilation: active airflow is essential to keep your gear cool and your space safe.
- Broad surface coverage trumps corner-only treatment: use thick panels on ceilings, walls, and doors for better sound control.
- Seal gaps and add soft flooring: simple DIY fixes that significantly cut noise leakage and reflections.
- Use a ‘rig in the closet’ wisely: it’s a fantastic noise-reduction hack if you control heat and airflow properly.

Focusound 52 Pack Acoustic Foam Panels 1" x 12" x 12" Sound Proof Foam Panles Soundproofing Noise Cancelling Wedge Panels for Home Office Recoding Studio with 300PCS Double-Side Adhesive
Soundproofing - Acoustic foam panels triangular grooves structure for better noise absorption, helps to reduce and absorb unwanted...
As an affiliate, we earn on qualifying purchases.
As an affiliate, we earn on qualifying purchases.
How a Closet Can Actually Improve Your Sound — And When It Fails
Placing your gear in a closet isn’t just about hiding noise; it’s about controlling reflections and isolating sound. Small spaces naturally create echo, flutter, and low-end booms because of parallel walls and hard surfaces. But if you treat the right spots, that tiny room can become a surprisingly effective vocal booth.
For example, hanging a thick blanket behind your mic can significantly reduce flutter echoes, which are caused by sound bouncing between hard surfaces. These echoes can muddy recordings and make it difficult to get a clear sound. Similarly, placing a rug on the floor absorbs reflections bouncing up from a hard surface, preventing a harsh, boxy tone. However, sealing the closet without proper ventilation can cause heat to build up, risking thermal damage to your gear and creating an uncomfortable environment. This tradeoff—between sound isolation and heat dissipation—is crucial. If you ignore ventilation, you might end up with a silent but overheated and potentially damaging setup. Therefore, understanding when a closet is suitable depends on balancing these factors—treating reflections to improve sound, while ensuring airflow to keep equipment cool. The wrong approach can turn your tiny studio into a heat trap that degrades equipment performance and makes long sessions uncomfortable. Proper planning around these issues ensures your closet becomes an effective, safe, and sound-controlled environment.
Moukey Portable Vocal Booth, One-piece Design Recording Booth with 720 Degree Sound Dampening, Home Studio Soundproof Booth for Voiceover, Podcast, Singing
Upgraded Sound Absorption - The Moukey vocal booth features a thickened but air-permeable sound insulation blanket, filled with...
As an affiliate, we earn on qualifying purchases.
As an affiliate, we earn on qualifying purchases.
The First Step: Find the Best Placement Inside Your Closet
The most impactful move is where you position your mic and performer. Place the mic away from reflective surfaces like walls and the door to minimize early reflections that can muddy your recordings. Moving the mic even a few inches away from reflective surfaces can drastically improve clarity, as it reduces the sound bouncing back into the mic capsule.
For example, setting your mic on a stand about 6 inches from the wall behind you and angling it towards your mouth helps to minimize reflections from the wall and door. Keep your head and voice away from corners, which tend to trap low frequencies and cause boomy, muddy sounds. Experimenting with different distances and angles is essential—small adjustments can lead to noticeable improvements in sound clarity. This process helps you understand how reflections and room modes influence your recordings, allowing you to optimize placement for your particular space. The key is to find a position that reduces unwanted echoes and low-end buildup without compromising the natural sound of your voice or instrument. This simple yet effective step often yields faster results than adding more treatment, making it a crucial first move in small-space recording optimization.

18 Pack Acoustic Panels-12"X10"X 0.4" Self-Adhesive Soundproof Wall Panels High-Density Sound Absorbing Panel Acoustic Treatment Panel Used in Home & Offices (Black Hexagon)
♬【Easy to Cutting and Install】Easy to cut with a knife, You could create different styles of decorative wall...
As an affiliate, we earn on qualifying purchases.
As an affiliate, we earn on qualifying purchases.
The Magic of Acoustic Dampening: How to Treat Your Closet Surfaces
Acoustic dampening isn’t just about soundproofing; it’s about controlling how sound behaves inside your space. Using dense, thick panels—like 2 to 4 inches of foam or bass traps—absorbs reflections and reduces echo. Focus on the ceiling, side walls, and behind the mic, rather than only the corners. Proper placement of these panels is essential because it targets the primary reflection points where sound bounces and creates comb filtering or echo. You might find useful insights on acoustic dampening and placement. For example, installing panels at ear level on side walls and directly behind the microphone can significantly cut flutter echoes, leading to a more natural, controlled sound. Bass buildup in corners can be addressed with bass traps, which are thicker and designed to absorb low frequencies that tend to accumulate in enclosed spaces. Learn more about acoustic treatment techniques. Remember, broad coverage of these reflection points is more effective than just treating corners alone, which mainly address low-end resonance but leave high-frequency reflections untreated. Strategically layering treatment across the room—covering main reflection points and adding bass traps—creates a balanced acoustic environment. This approach ensures clarity across the frequency spectrum, helping your recordings sound more professional and less 'roomy.' For additional tips, visit a wellness site about self-care and home wellness. The tradeoff involves balancing treatment coverage with practical considerations—over-treating can deaden the sound excessively, so focus on the main reflection zones first for optimal results.

Sound Addicted - Studio Monitor Isolation Pads for 5 Inch Monitors, Pair of Two High Density Acoustic Foam which Fits Most Speaker Stands | SMPad 5
SMPad 5 is made out of the highest quality acoustical foam (50kg/m^3 density).
As an affiliate, we earn on qualifying purchases.
As an affiliate, we earn on qualifying purchases.
Ventilation & Heat: The Hidden Challenge of the 'Rig in the Closet'
Putting a hot, high-power machine in a sealed closet sounds perfect—quiet and out of sight. But heat is the enemy. For more on maintaining optimal conditions, see how to reduce heat and noise in your AI workstation. Trapped heat can cause your GPU or CPU to throttle, making fans roar and defeating the purpose of a quiet setup. Overheating can also lead to hardware failure or reduced lifespan of your components. To avoid this, incorporate active ventilation solutions such as quiet exhaust fans, vents, or ducted airflow systems. A simple passive vent can help, but a fan that circulates air and pulls hot air out ensures your rig stays cool and operates efficiently. For example, installing a small, quiet exhaust fan at the top of the closet and an intake vent at the bottom creates a natural airflow cycle, removing hot air while bringing in cooler air. This not only maintains safe operating temperatures but also prevents heat from building up, which can cause thermal throttling or damage. Some professional soundproof cabinets combine foam lining with ducted cooling systems, balancing silence with effective heat dissipation. You can explore more about sleep health and wellness strategies to optimize your environment. Proper ventilation is an investment in your gear’s longevity and consistent performance. Check out this guide on how to keep your closet rig cool without noise: Reduce heat and noise in your AI workstation.
Door, Walls, and Floor: Seal Up the Gaps for True Privacy and Less Noise
Small gaps around the closet door and cracks in the walls let sound leak out and reflections in. Sealing these with weatherstripping, acoustic sealant, or hanging blankets can vastly improve both sound isolation and acoustic dampening. Gaps in the door frame allow sound to escape and external noise to enter, undermining your efforts to create a controlled environment. Using weatherstripping around the door frame creates a tighter seal, preventing sound leaks. Hanging a heavy curtain or blanket over the door absorbs reflections and further reduces noise transmission. Soft flooring, like a rug or carpet, also helps absorb reflections bouncing off hard surfaces, making the room sound less echoey and more controlled. These simple DIY tweaks—sealing gaps and adding soft flooring—are inexpensive yet highly effective, transforming your closet from a leaky echo chamber into a more isolated and acoustically friendly space. The key is to focus on the main points of leakage and reflection, which often have outsized impacts on sound quality and noise isolation.
Mic Placement & Performer Position to Maximize Sound Quality
The way you position your mic and yourself makes a huge difference in a tiny room. Keep the mic close to your mouth—within 6-8 inches—to reduce room sound pickup and ambient reflections. Positioning the mic too far away allows more of the room’s reflections into the capsule, muddying the sound. Angle the mic so it faces your mouth directly and away from reflective surfaces like walls or the door. Using a cardioid pattern helps reject off-axis noise and room reflections, but proper placement is still essential. For example, a microphone aimed directly at your mouth and slightly off the wall minimizes the pickup of room reverberations and low-frequency buildup. Additionally, positioning yourself away from the door and corners reduces echo and bass boom, resulting in a clearer, more focused vocal. This simple setup—close mic, proper angling, and performer positioning—ensures your recordings are crisp and natural, even in less-than-ideal spaces. Understanding how proximity and angle influence sound capture is key to maximizing quality in small, reflective environments.
DIY Treatment Options: Blankets, Panels, and Bass Traps — What Works Best?
DIY solutions can be surprisingly effective. Heavy moving blankets hung with grommets or hooks create quick, affordable sound barriers that absorb mid and high frequencies. For bass trapping, dense foam or mineral wool panels placed in corners can absorb the low frequencies that tend to resonate and cause muddiness. Use thick blankets on walls, ceiling, and door—layered for more absorption—focusing on the main reflection points. For bass traps, stacking foam or mineral wool in corners helps tame low-end resonances that travel along the room's boundaries, which are often the most problematic frequencies in small spaces. The key is broad surface coverage with thicker materials, which provides a more balanced absorption across the spectrum. According to recent DIY trends, layering and covering large areas with affordable materials yields results comparable to professional treatments. Check out this guide on DIY acoustic treatment.
Common Mistakes That Ruin Your Closet Studio
Over-treating or under-treating is a frequent mistake. Filling every inch with foam can deaden your sound excessively, making the space sound dull and lifeless, which hampers natural recordings. Conversely, neglecting to seal gaps or provide ventilation leads to noise leaks, external disturbances, and heat buildup that can damage equipment or make sessions uncomfortable. Another common mistake: placing the mic directly in front of a reflective wall or corner, which causes excessive low-end resonance and echo. Always experiment with placement first, then add treatment where reflections are most prominent. Remember, your goal isn’t perfect silence—it's controlled acoustics and manageable noise. Achieving a balance between absorption, reflection control, and ventilation is key to a functional and effective closet studio.
When Is a Closet Studio Good Enough — And When Not?
A closet studio works well for voice-overs, podcasts, and some guitar recordings. It’s cheap, quick, and keeps noise contained, making it ideal for quick projects or practice. However, it’s not suitable for high-fidelity recordings or mixing, where room acoustics and low-end control are critical. For critical tasks like mixing, mastering, or recording full bands, a dedicated room with proper treatment and space is necessary to capture the full spectrum of sound accurately. Think of a closet as a practical, budget-friendly compromise—great for quick, focused recordings, but not a substitute for a proper studio environment when quality is paramount. The limitations include restricted low-frequency control, potential for boxy sound, and challenges in achieving optimal acoustic balance. Use it wisely according to your needs, and consider investing in a dedicated space if your projects demand it.
Frequently Asked Questions
What’s the difference between acoustic dampening and soundproofing?
Acoustic dampening reduces echo and reflections inside a space, making recordings clearer. Soundproofing blocks sound from leaving or entering the room, which often involves sealing gaps and adding mass—more expensive and complex.
Where should I place acoustic panels in my closet studio?
Place panels on the ceiling, side walls, and directly behind your mic—especially at reflection points. Avoid treating only corners; broad surface coverage works better for reducing flutter echoes and controlling low frequencies.
Do I need bass traps in a small closet?
Yes, if you notice low-end boom or resonance, bass traps in corners help absorb these frequencies. Thicker panels (4 inches) are more effective at tackling bass buildup in tight spaces.
How much coverage do I need for a decent closet studio?
Cover at least 50-70% of the main reflective surfaces—ceiling, walls, door. More coverage improves clarity, but overdoing it can deaden the sound. Focus on the main reflection points first for balanced acoustics.
Will sealing gaps and adding blankets make my closet soundproof?
Sealing gaps and adding blankets improves sound isolation somewhat but won’t make your closet completely soundproof. It cuts noise leakage and reflections but not entirely. For full soundproofing, more extensive measures are needed.
Conclusion
Transforming a tiny closet into a recording haven is about more than just adding foam. It’s a strategic game of placement, treatment, and airflow. Think of your closet as a mini studio—well-ventilated, carefully treated, and positioned for best sound.
Remember: the real magic isn’t in fancy gear but in how you set it up. With a bit of effort, your closet can be a surprisingly good space for capturing clear, professional-quality sound—without breaking the bank or losing your mind.